TUTORIAL: Get started with Trackost
About 30 minutes: sign up, save your profile, walk one material, recipe, batch and sale through Trackost, then plan the day you bring your real stock in.
Why this matters
Trackost follows your stock from the materials you buy, through the batches you make, to the orders you ship. At each step it works out what things really cost you, so every sale shows its true profit. The fastest way to see how that fits together is to walk it once: one material, one recipe, one batch, one sale. This tutorial does that in about half an hour, then points you at the separate sitting where your real stock goes in.
There is no reset button and no way to wipe a workspace, so what you enter here stays. Use a real material and a real product you make, and keep it to one of each. Then the practice run becomes your first real record.
Sign up for the 14-day trial
Go to app.trackost.com/login, open the Create account tab, and fill in Name, Email and Password. The Start free trial button on trackost.com opens the same tab.
Click Create account, then click the link in the confirmation email. Your workspace starts a 14-day trial of the Studio plan, with no card, and Get started opens. Create your Trackost account covers signing up with Google.
Save your business profile
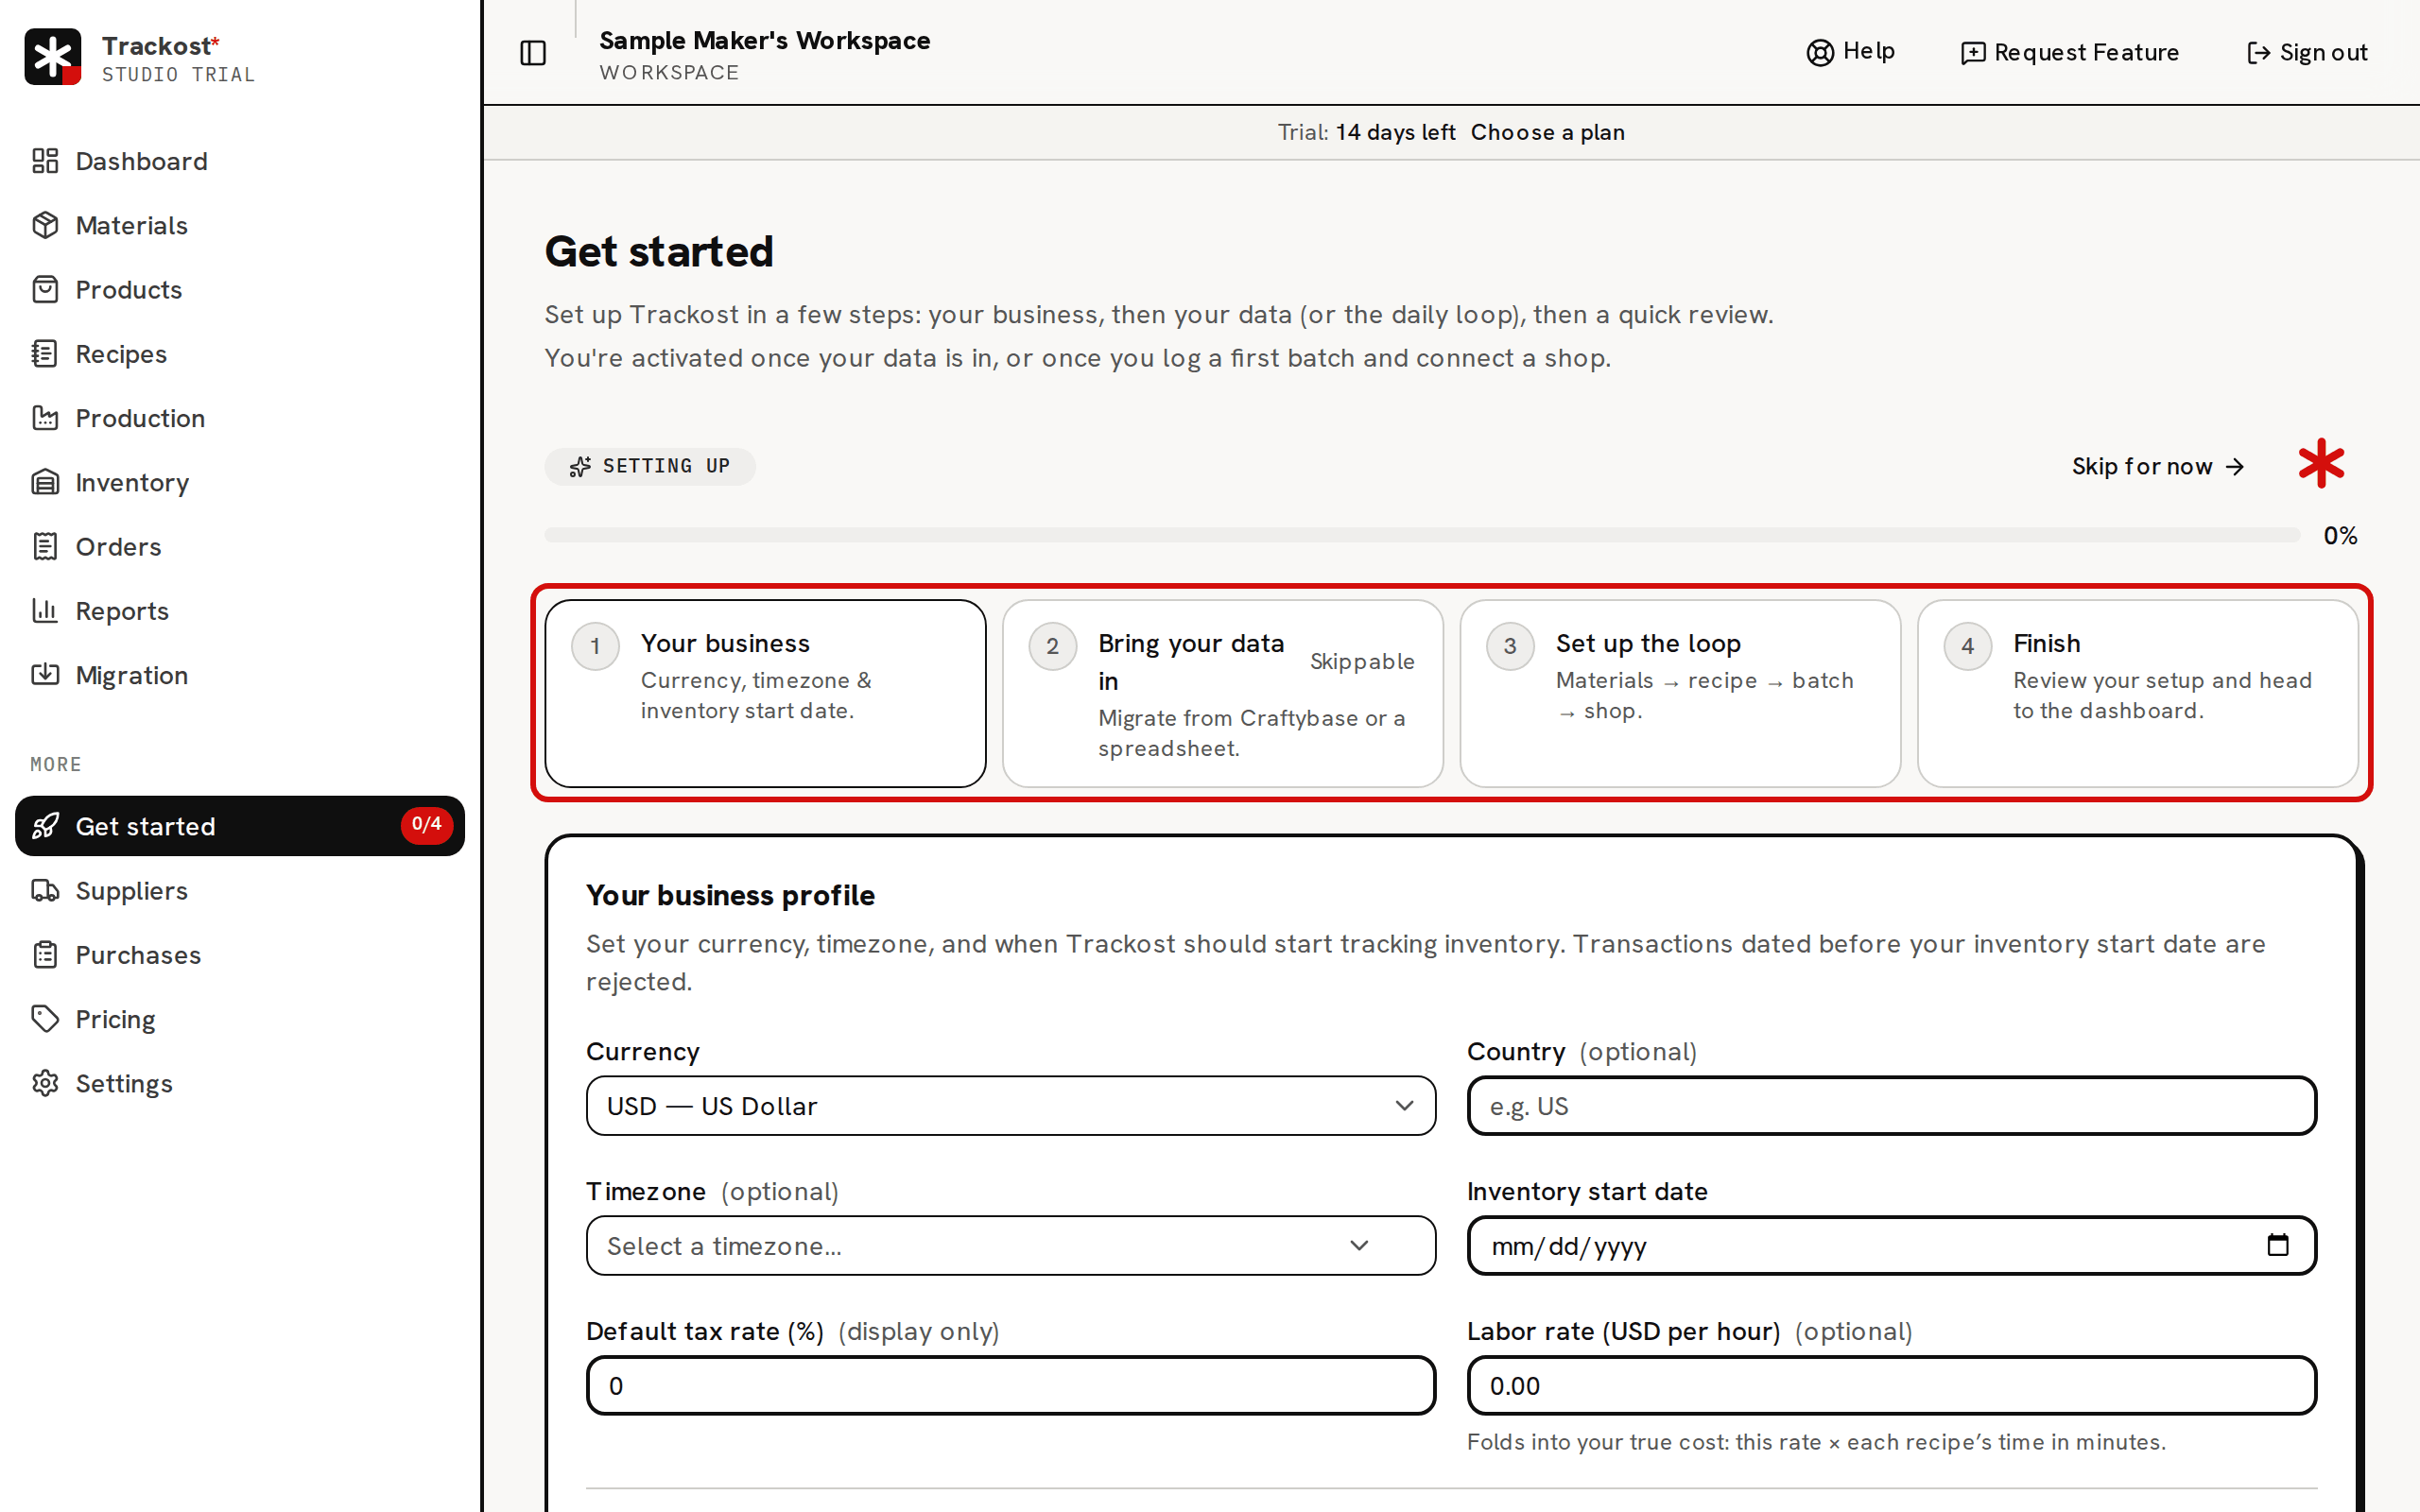
Get started is a four-step setup wizard. You can reach it any time from the sidebar, under More › Get started.
In step 1, Your business, choose your Currency.
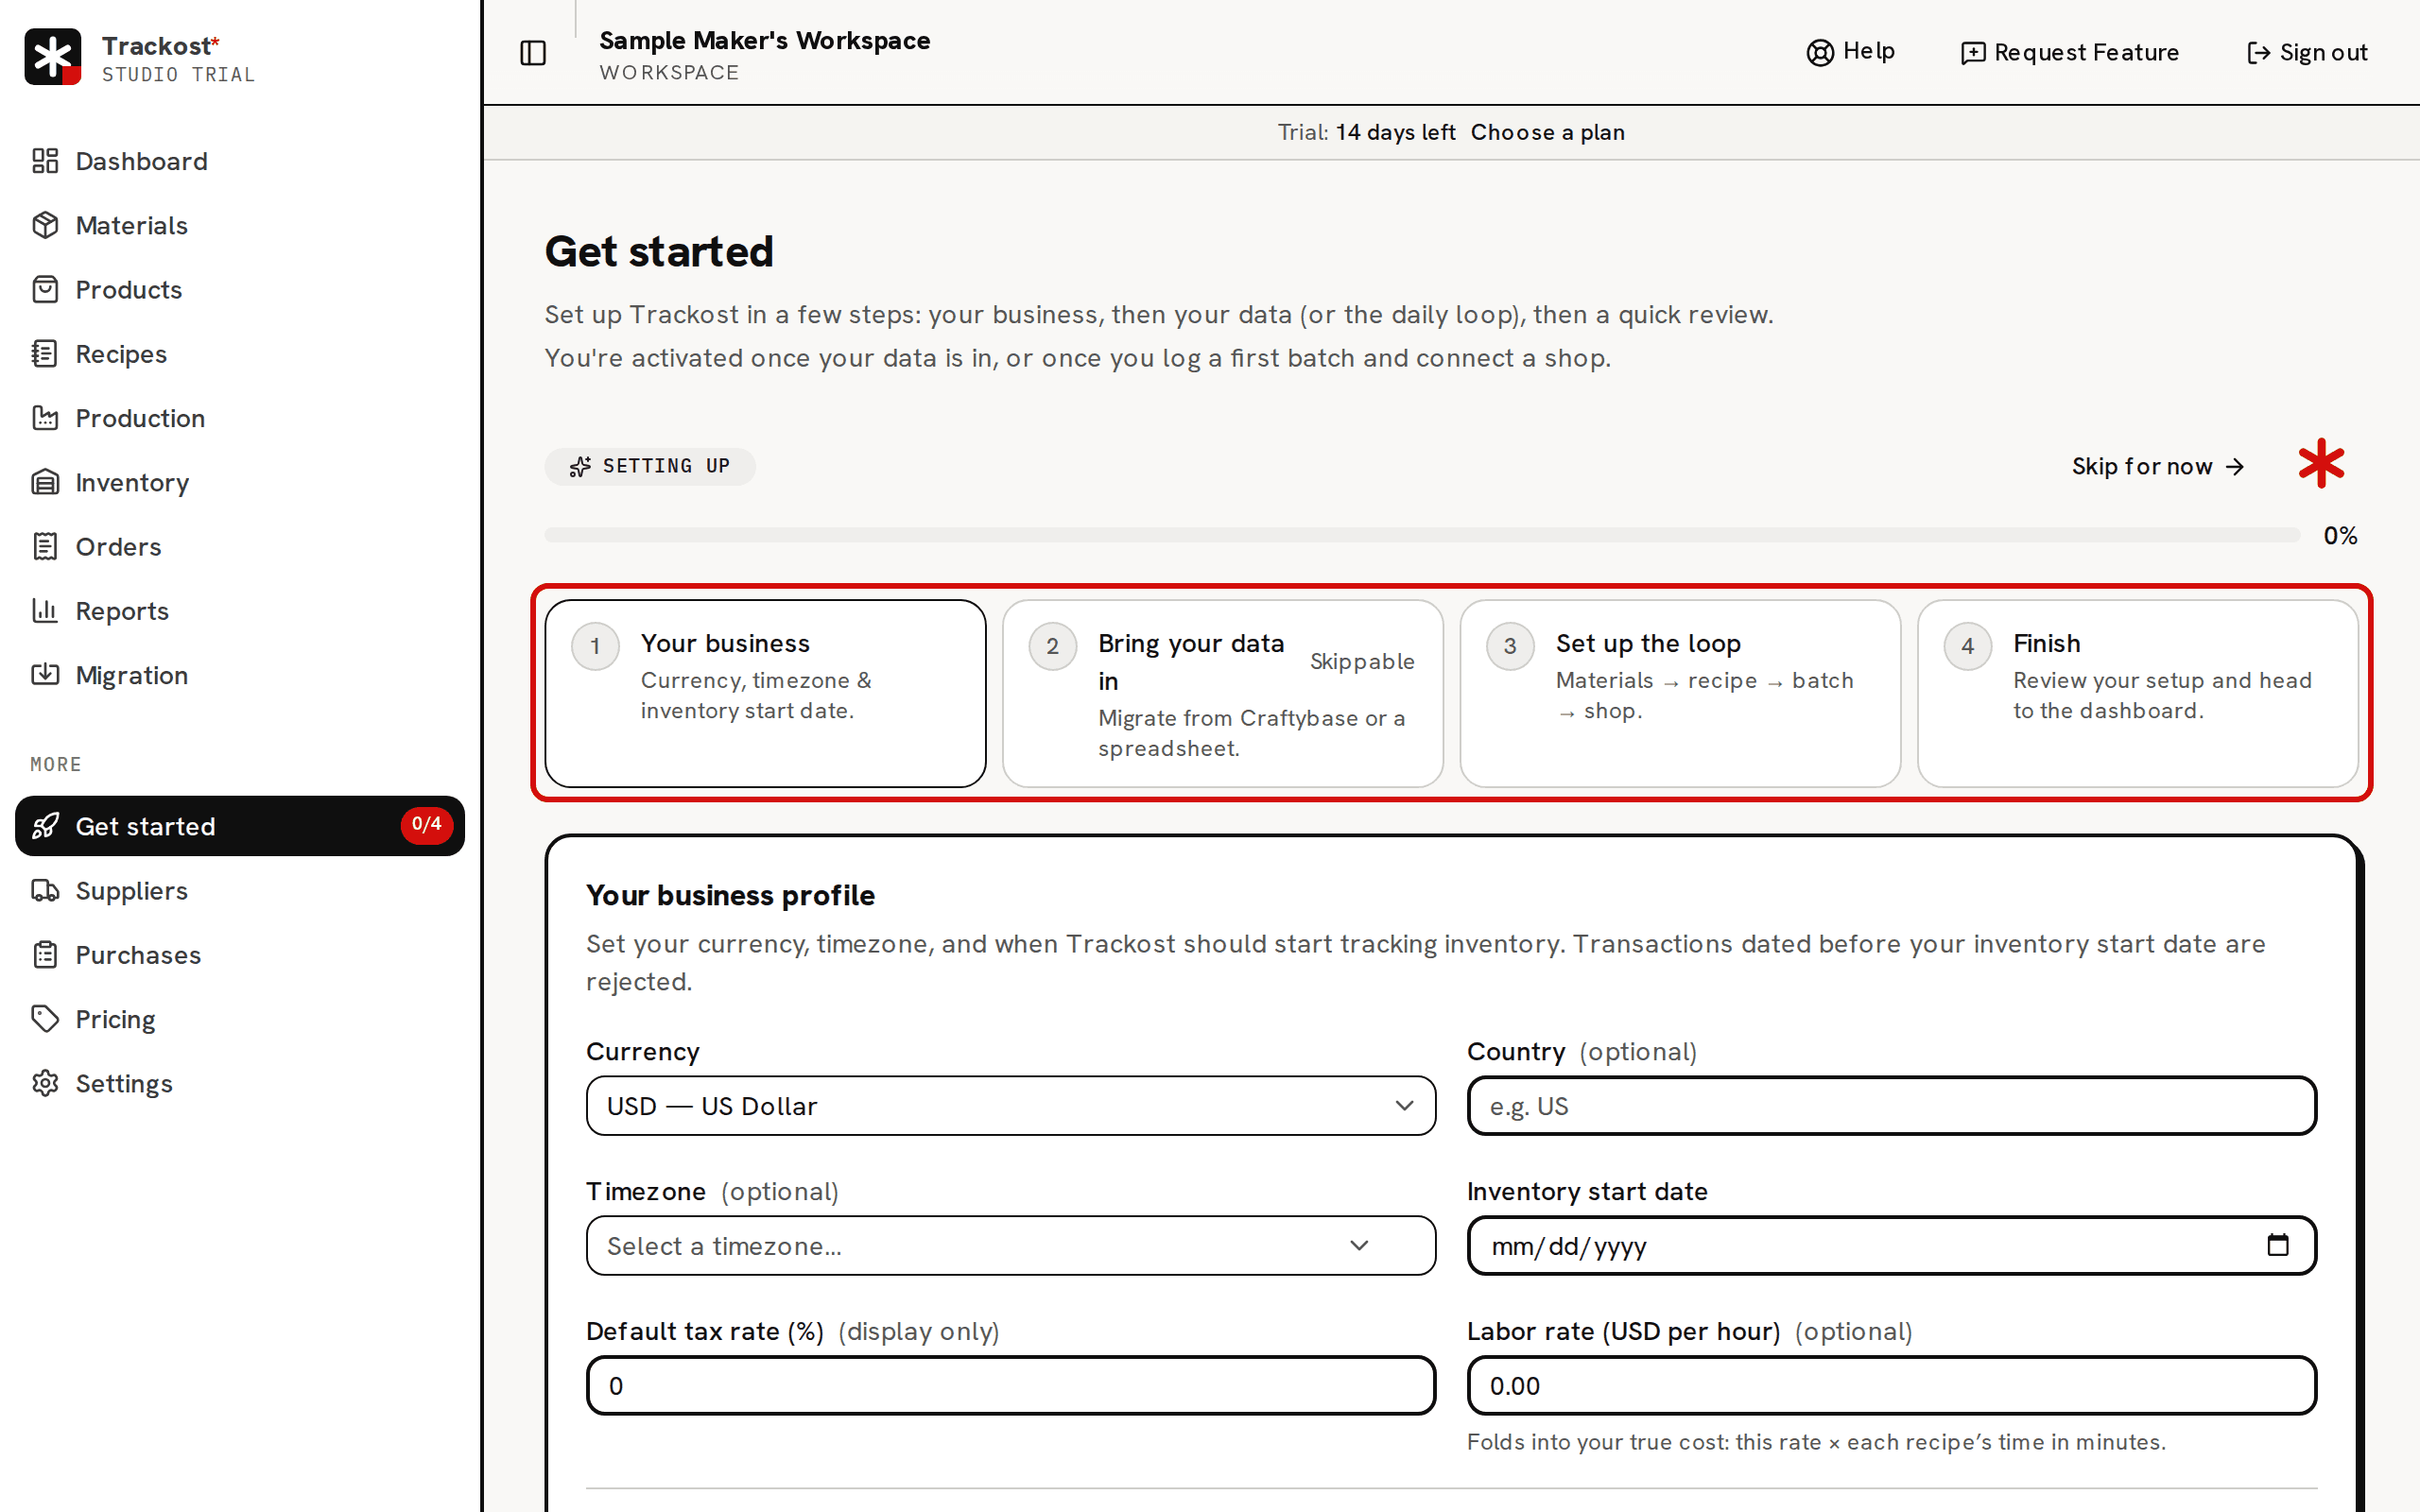
Get started: four steps, ticked from your real data, never from clicks. Set the Inventory start date to the first of this month. It is the first day Trackost counts stock, and purchases, batches and adjustments dated before it are refused. A start date of today can refuse what you record early in the day if you are east of UTC.
If you want your time in your costs, type your hourly labor rate. The field is labeled with your workspace's currency, Labor rate (USD per hour) in the pictures, which come from a US dollar workspace. In a euro workspace it reads Labor rate (EUR per hour).
Click Save profile. 'Profile saved' appears and the wizard moves to step 2. If your plan has ended, saving is refused with 'Your plan has ended — subscribe to continue making changes.'
Step 2, Bring your data in, offers to move your data in from another tool or a spreadsheet, free. For this run, click Skip this step. You can ask for the migration later.
Walk the loop once with one real product
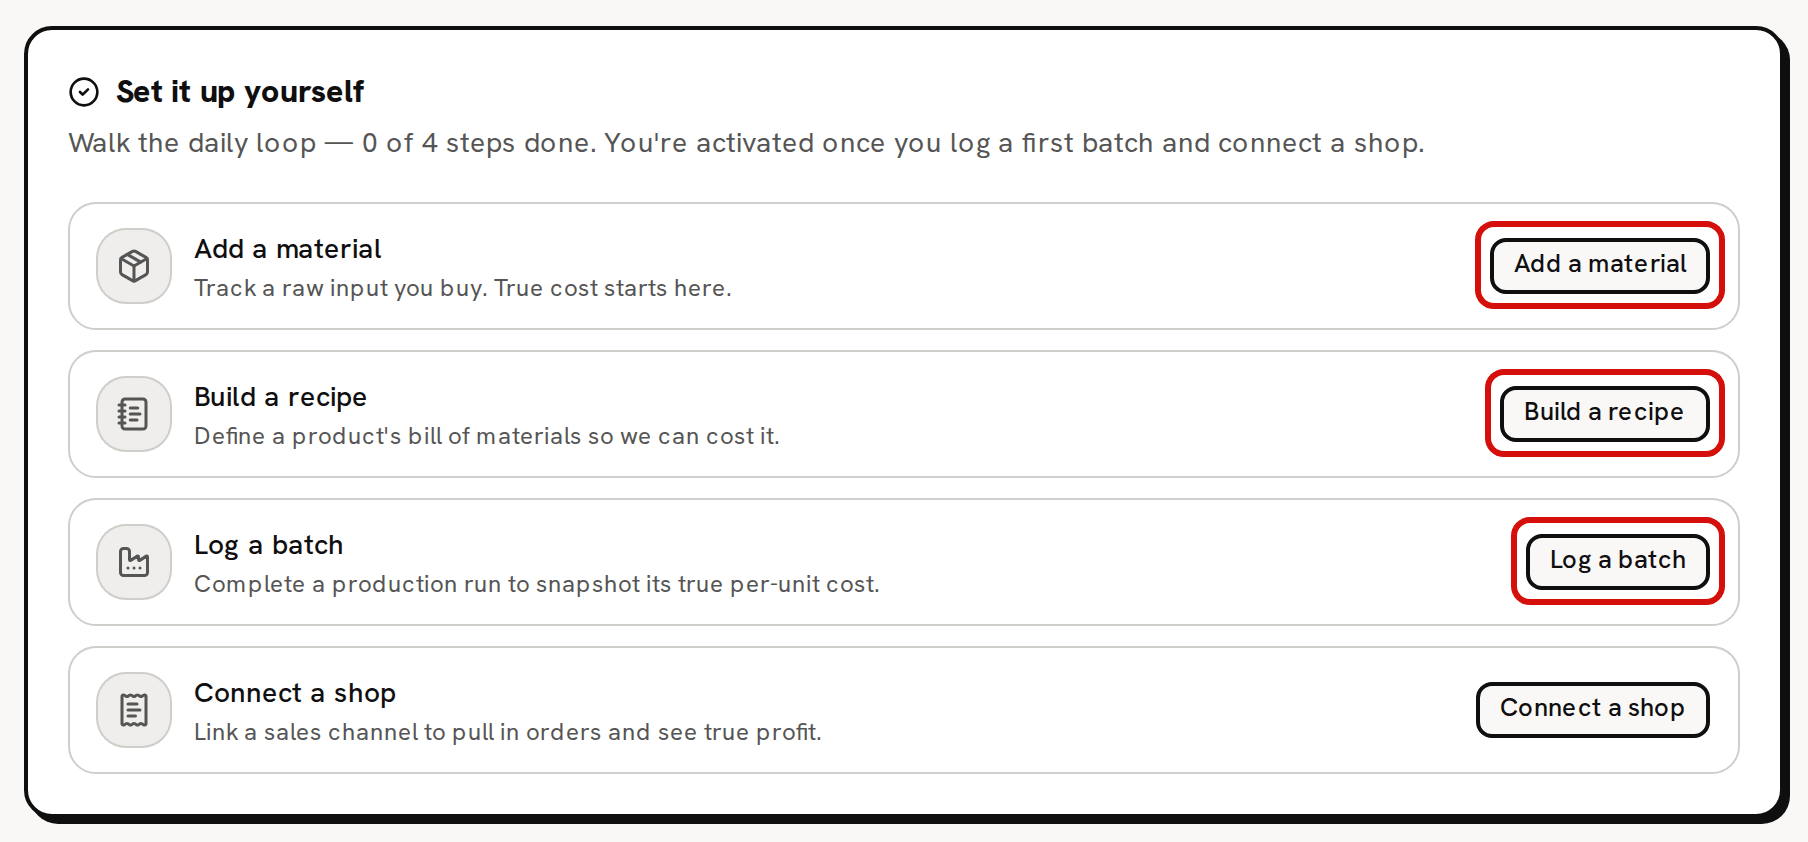
Step 3, Set up the loop, opens the Set it up yourself card, with a button for each part of the daily loop. Use the first three. The fourth, Connect a shop, links a sales channel. Connecting a sales channel (Shopify, Etsy or Faire) isn't covered in this help center yet. Email support@trackost.com and we'll walk you through it.
Click Add a material, then Add material. Give it a name and unit, and under Opening stock (optional) enter an Opening quantity and the Opening total cost ($) you paid for it. Click Add material.
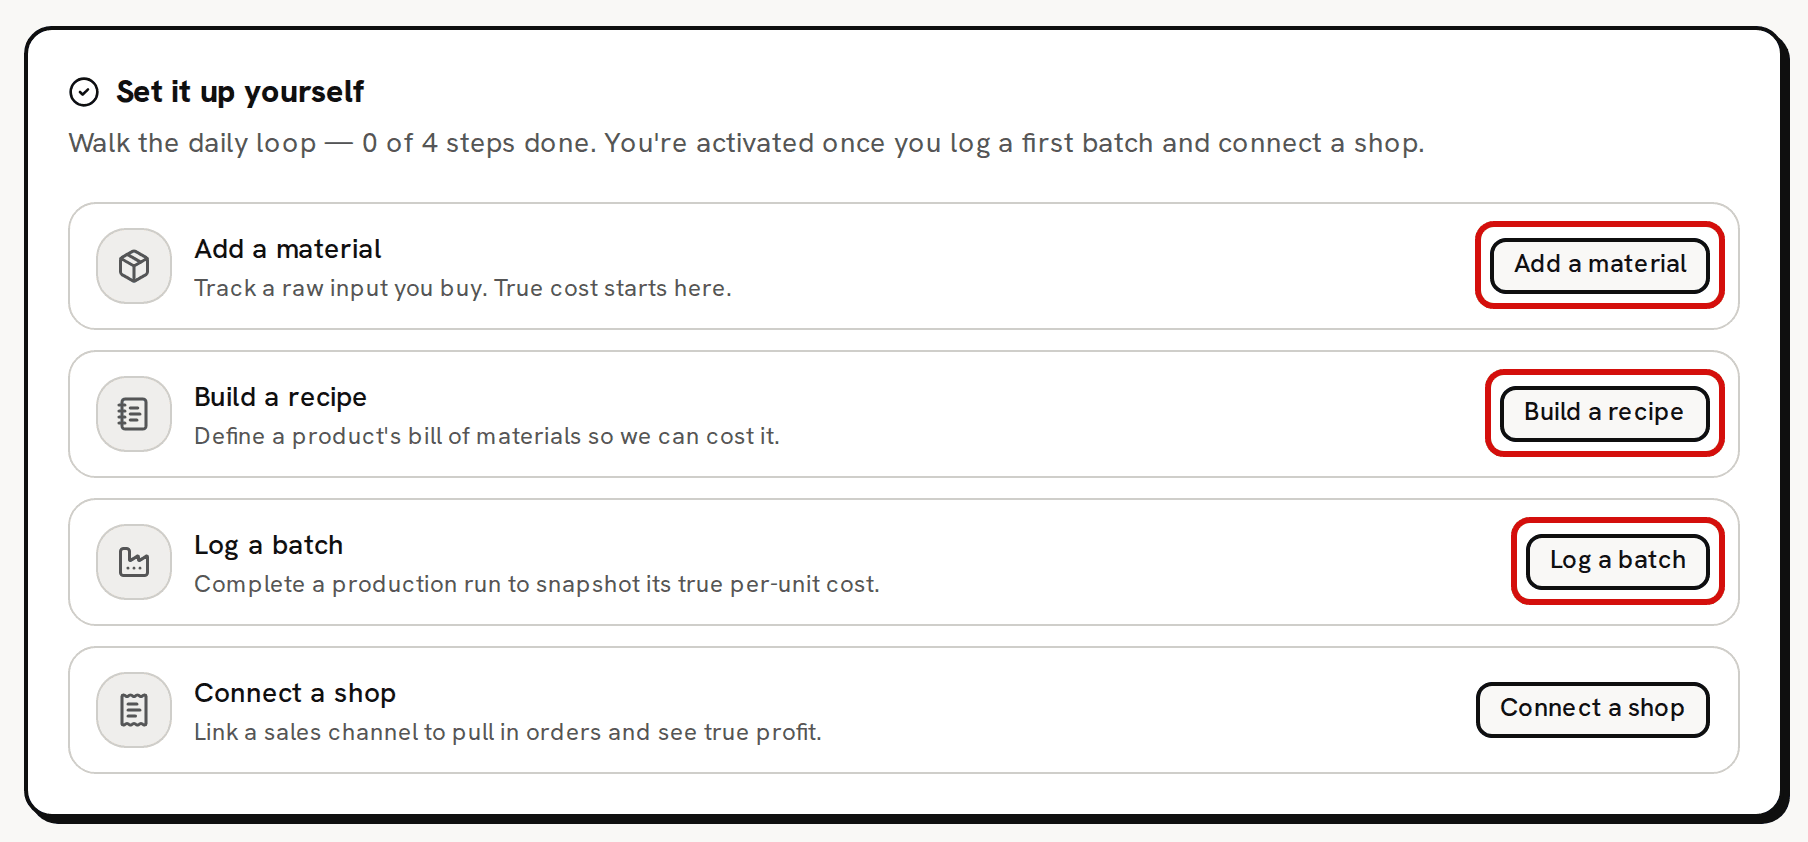
Step 3 opens each page of the daily loop. Open Products, click Add product and save the product you make, with its name.
Back in Get started, click Build a recipe. On your product's row, click Build, add your material as a component with the quantity one batch uses, set the yield and the labor minutes, and click Save recipe version. The recipe shows what one unit costs today under Live cost.
Click Log a batch, then Plan a run. Pick your product and how many to make, and click Make it now. The material's on hand falls by what the batch used, and the product gains stock with a unit cost worked out from your recipe.
Record and fulfill one sale
Open Orders and click New order. Use a sale you really made, so it counts. Pick your product on a line, enter the quantity and the unit price, and click Create order.
On the order, click Fulfill & mark shipped. Trackost takes the units out of stock and records their cost as the sale's COGS, at the product's cost at that moment.
Read the cards at the top of the order: Revenue, Fees, COGS, True profit and Margin.

The loop ends here: a fulfilled order shows its COGS and true profit.

Next: bring your real stock in
Your real stock goes in at a separate sitting, on the day you count what you hold. Plan it now. Pick the day, set it as your inventory start date, and enter each material and product you hold with what it cost you. Bring your real stock into Trackost walks through it. There is no file import in the app. If you're moving from another tool or a spreadsheet, ask for the free migration and we move your data in for you.
Working forward: purchases, batches, orders
From your counting day on, record things as they happen: each purchase when it arrives, each batch when you make it, each order when it ships. That is what keeps your stock counts and your true costs right. Batches and adjustments are always dated today, so a batch you forget to log can't be dated back later.
What you have now
You have a workspace on a 14-day trial, a saved business profile, and one material, recipe, batch and sale that show how cost moves from what you buy to what you sell. The dashboard now shows your first numbers. Next comes your real stock, on the day you count it.